SUBJECT VEHICLE: 2008-09 Chrysler PT Cruiser.
SENSOR IN TIRE? No (sensors are attached to each wheel through valve stem hole).
RESET PROCEDURE? No formal procedure.
SPECIAL TOOLS NEEDED? No.
The PT Cruiser’s tire pressure monitoring system (TPMS) is unusual in that it does not specify how many tires are low or where they are located.
The TPMS consists of sensors that are attached to each wheel through the valve stem mounting hole, a central receiver module (CRM) and an indicator lamp.
The CRM also can include a Remote Keyless Entry (RKE) receiver, Remote Start and the Sentry Key Immobilizer (SKIM) receiver. All receivers share a number of components.
The CRM decodes the signals sent by each tire pressure sensor. The data is used to determine if a “warning” or “fault” condition exists within the TPMS. Transmissions occur once every minute at speeds of 15 miles per hour or higher.
If the TPMS detects that pressure in any tire has fallen, the indicator lamp will illuminate. If the CRM detects a “warning” or “fault” condition when the ignition key is turned ON, it will wait 10 seconds before sending the first request to illuminate the lamp. The display module will request a chime at each ignition cycle for every “warning” or “fault” that has been detected.
[PAGEBREAK]
The TPMS will continue to alert the driver of low pressure as long as that condition exists and will not turn off the indicator lamp until pressure has been restored to or above the low pressure lamp OFF threshold. The TPMS will update and the TPMS warning lamp will turn off when pressure levels have been restored.
Swapping them out
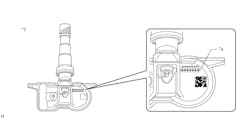
With that in mind, you’re ready to swap the old sensor for a new one. First you have to remove the tire and wheel assembly from the vehicle. And make sure you are using the correct replacement sensor. Sensors can be identified by a white outline oval insignia on the sensor body. Follow these steps:
1. Remove the tire/wheel assembly.
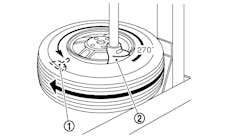
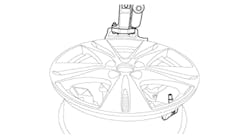
2. Demount the tire from the wheel. Avoid using the bead breaker in the area of the sensor.
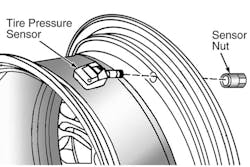
3. Using a thin-walled socket, remove the special nut retaining the sensor to the wheel. Hold pressure against the rear metal valve stem to prevent the stem from pushing backwards.
4. Remove the old sensor from the wheel.
5. Replace the seal and metal washer at the base of the valve stem.
6. Clean the area around the sensor mounting hole.
7. Insert the sensor through the wheel (see Figure 1) and keep pressure against the rear valve stem. Do not try to mount the sensor in another manner.
[PAGEBREAK]
8. Install the sensor nut by hand.
9. Push downward on the sensor housing so it’s flush with the interior contour of the rim.
10. Using a thin-walled socket, install the sensor nut. Tighten the nut to 71 in.-lbs.
11. Mount the tire on the wheel.
12. Adjust air pressure levels to specification. Make sure the valve stem cap is secure.
13. Install the tire/wheel assembly on the vehicle.
Now you’re ready to retrain the new sensor. Remember, whenever a sensor has been installed, the Cruiser’s TPMS must be retrained. However, this vehicle does not require a formal retraining procedure.
Instead, Chrysler recommends driving the vehicle for at least 10 minutes at a continuous speed of at least 15 mph. During this period, the TPMS will learn the new sensor ID code.
Keep in mind that the TPMS low pressure light will stay ON until tires have been adjusted to specified inflation levels.
If you discover that the warning light continues to flash ON and OFF for 75 seconds, and then remains solid, there is a problem with the TPMS as a whole. At this point, your best bet is to seek appropriate manufacturer service information.
■
Information for this column comes from Mitchell 1’s ”Tire Pressure Monitoring Systems Guide” for domestic and import vehicles through 2009. Headquartered in Poway, Calif., Mitchell 1 has provided quality repair information solutions to the automotive industry for more than 80 years. For more information, visit www.mitchell1.com.


