SUBJECT VEHICLES: 2006-2009 Volkswagen Rabbit, 2010-2012 VW Golf, 2012 VW Golf R, 2008-2009 VW GLI, 2006-2012 VW GTI, 2005-2012 VW Jetta, and 2008 VW R32.
RELEARN PROCEDURE? Yes.
SPECIAL TOOLS NEEDED? Yes. A Volkswagen VAS 5051B.
NOTE: Some vehicles may be equipped with an indirect tire pressure monitoring system (TPMS). Although the indirect system does not use tire pressure sensors installed on the four wheels, the reset procedure under “Basic setting” is the same for direct and indirect TPMS.
NOTE: Whenever a wheel is changed or replaced, the tires rotated, a new sensor installed, or whenever the vehicle has b een loaded, the TPMS needs to be reset. See “Reset procedures.”
Tire pressure monitoring system
Air pressure sensors, located in the wheels, transmit radio data signals to the central locking and antitheft system antennas. These signals are then directed to the TPMS control module.
The TPMS control module is integrated with a diagnostic address in the comfort system central control module.
The TPMS checks the tire pressures of all four road wheels, and warns in the event of a loss of pressure by means of symbols in the instrument cluster displays. A visual and audio warning will signal a rapid or other significant loss of pressure while the vehicle is moving. The system uses sensors at the wheels, which are integral parts of the air valves.
NOTE: There may be differences between the pressure readings from a hand-held pressure gauge and the pressure readings displayed in the instrument cluster. The TPMS is more accurate.
Under the following conditions, the system may not function properly:
- Insufficient tire pressure.
- Structural damage on the tires.
- Load on the vehicle on one side.
- One axle is heavily loaded (i.e., when pulling a trailer).
- When snow chains are used.
- When a spare wheel is installed.
- One wheel is replaced.
- Tire pressure sensor battery is depleted (seven- to 10-year life span).
Tire pressure monitor warning light
The TPMS checks the tire pressures of all four road wheels, and warns in the event of a loss of pressure by means of symbols in the instrument cluster displays. A visual and audio warning will signal a rapid or other significant loss of pressure while the vehicle is moving. When the low tire pressure warning light comes on, immediately check air pressure of all tires and adjust to the specified pressure. Then reset the TPMS. If the light is still on, there is a malfunction in the TPMS. See the appropriate manufacturer service information.Reset procedures
NOTE: Some vehicles may be equipped with an indirect TPMS. Although the indirect system does not use tire pressure sensors installed on the four wheels, the reset procedure under basic setting is the same for direct and indirect TPMS.
NOTE: Whenever a wheel is changed or replaced, the tires rotated, or whenever the vehicle has been loaded, the TPMS needs to be reset. If a wheel is changed or replaced, or the tires rotated, see “Basic setting.”
- If the wheels are changed and replaced with manufacturer-approved wheel/tire combinations (i.e., from summer to winter tires) or if tire pressure deviates from the pressures given on the fuel filler flap, see “After a wheel or pressure change.”
- If the vehicle is equipped with unapproved tires or tires with pressures other than those listed on the fuel filler flap (a second wheel set), see “Wheel sets with different pressure specifications.”
Tire pressure monitor system reset
CAUTION: DO NOT reset the TPMS until all problems are fixed and the tire pressure in all tires has been adjusted. If the reset procedure is done when tire pressures are incorrect, the TPMS will not work properly and may not set an alert when a tire pressure is low or high.
Basic setting
NOTE: This procedure cannot be performed unless the vehicle is equipped with a SET button. The SET button is located near the gear shift lever or in the glove box.
NOTE: Use this reset procedure for indirect TPMS.
1) Set the tire pressure of all wheels to the specified pressure.
2) With the vehicle stopped and the parking brake applied, turn the ignition switch to the ON position.
3) Press the SET button (located near the gear shift or behind the glove box door) until an audio signal is heard. The signal confirms the basic setting.
After a wheel or pressure change
1) Set the tire pressure of all wheels to the specified pressure.
2) With the parking brake applied, allow the vehicle to stand for 20 minutes (five minutes after a recognized tire puncture), so that the control module enters the learning mode.
NOTE: An acceleration data check also occurs with vehicle speed.
This process takes about seven minutes.
3) Drive the vehicle at 16 mph (25 km/h) or more. As soon as the vehicle reaches this speed, tire pressure sensor IDs are automatically recognized and read by the control module.
Wheel sets with different pressure specifications
NOTE: If unapproved wheel/tire combinations are installed, a second wheel set must be learned. To perform this procedure, Volkswagen VAS 5051B is required.
1) Read out tire pressure sensor IDs before installation.
2) Switch the TPMS to wheel set 2.
3) Enter the needed specified tire pressures and sensor IDs into the system.
Demounting/mounting procedures
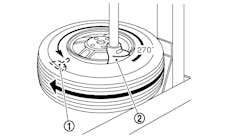
CAUTION: The tire should be demounted from the wheel using the tire changer manufacturer’s instructions. Use the following information to avoid damage during the demounting/mounting procedures.
NOTE: Some vehicles may be equipped with an indirect TPMS. The indirect system does not use tire pressure sensors installed on the four wheels.
NOTE: Whenever a wheel is changed or replaced, the tires rotated, a new sensor installed, or whenever the vehicle has been loaded, the TPMS needs to be reset. See “Reset procedures.”
Tire pressure sensor
Removal
CAUTION: Replace the valve core each time a tire is changed. Use only the original valve insert from the manufacturer, as it has a special coating.
CAUTION: Use only the original valve caps from the manufacturer. Do not use comfort valve caps and metal caps.
1) Remove the tire and wheel assembly from the vehicle.
2) Demount the tire from the wheel following the tire changer manufacturer’s instructions.
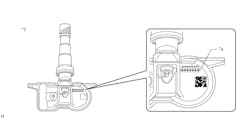
3) Unscrew the union nut (see Figure 1).
4) Remove the tire pressure sensor from the rim well.
Installation
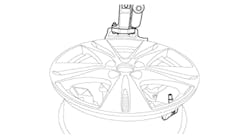
1) Install the new sealing ring and washer on the tire pressure sensor. Insert the sensor and press it into the disc wheel/rim (see Figure 2).
2) Install the union nut.
3) Press the tire pressure sensor onto the rim well, and tighten the union nut to 71 in.-lbs. (8 N.m). This will cause the sealing washer to become slightly deformed.
4) Install the tire and wheel assembly to the vehicle.
5) Adjust the inflation pressures of all tires, and balance the tires. Store the new tire pressures in the system. See “Reset procedures.”
Torque specifications
Component Ft.-lbs. (N.m)
Wheel nut 89 (120)
In.-lbs. (N.m)
Tire pressure sensor union nut 71 (8)
Information for this column comes from Mitchell 1’s “Tire Pressure Monitoring Systems Guide” for domestic and import vehicles. Headquartered in Poway, Calif., Mitchell 1 has provided quality repair information solutions to the automotive industry for more than 80 years. For more information, visit www.mitchell1.com.
To read more TPMS articles, click:
2007-13 Chrysler/Jeep Compass and Patriot


