AG Tire Talk: In-Shop or In-Field?
Tips for Ag Tire Dealers
- Using a tire machine can make mounting easier and more consistent, reducing physical strain and risk of damage, especially for large ag tires.
- Technicians should be trained in both manual and machine methods, understanding techniques to avoid bead damage, rim scratches and improper seating that can lead to premature tire failure.
- Choosing the right mounting method depends on the situation, with skilled technicians capable of safely using either approach to maximize tire longevity and safety.
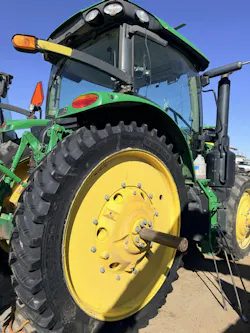
Question: When servicing ag tires, do you prefer to use an in-shop tire mounting machine or the traditional manual pry bar method and how can a tech reduce the risk of tire damage on both mounting methods?
Robert Bender, product manager and tech support, off-highway tires, Ascenso Tires North America: If I’m working in a shop that’s set up with a good tire machine, I’m probably using the machine. However, I still think every tire technician should learn how to properly mount and dismount a tire with bars. There are going to be times when you’re out in the field and the machine isn’t available or something breaks. If you don’t know the basics of tire bars, you’re going to have a long day.
Before getting into mounting methods, let’s talk about safety. I’ve learned a few things the hard way over the years and that experience taught me your number-one job, above everything else, is to go home safe.
Start with the basics:
-
Wear personal protective equipment;
-
Inspect the service area;
-
Lock out/tag out equipment and service area, including wheel chocks;
-
A hydraulic jack is for lifting only, not for supporting the load while you’re working on it;
-
Crib/support equipment properly;
-
During service of dual wheels, deflate both, even if one is to be serviced;
-
Handle the tires, using lifting straps, a chain sling and a tire manipulator;
-
Use proper inflation devices to stay out of the tire’s trajectory.
I’d also encourage every dealer to invest in training. There are great programs through the Tire Industry Association, covering farm, earthmover, truck and even passenger tire service. Our industry has always relied on the tribal knowledge of older technicians teaching the next generation and there’s a lot of good knowledge that gets passed along. But not everything we’ve always done is necessarily the best way to do it.
It’s a lot of technique. Once you understand how to work the bead into the drop center and let the tire work with you instead of against you, the job gets a lot easier.
Most of my career was spent using tire bars, so they’re still my preferred method simply because that’s what I’m comfortable with. I have also used my mini-boom as a third hand more times than I can count. Having a mini-boom or tire manipulator is a huge help when you’re handling large ag tires.
One thing I see on a regular basis that concerns me is how tires are handled. This includes technicians using bead hooks to lift and position tires and sometimes even tow truck hooks to pull tires off wheels. I understand why they do it. But after learning more about tire construction over the years, it’s not something I’d recommend. Bead hooks should be reserved for scrap tires only.
Some of the largest ag tires can weigh up to 800 pounds or more. When you hang one from a bead hook, all that weight is hanging on one small section of the bead bundle. Is it going to damage every tire? Probably not. But why take the chance? It’s better to cradle the tire with a sling or use equipment that’s designed to lift it. The same thing goes for using the boom to force a tire onto the rim. It's easy to roll the bead, damaging the bead bundle or sidewall from pushing the tire on. The same goes for pulling a tire off the rim with a bead hook, which increases the risk of tire damage. Then we’re right back to safety again.
Shortly before I left the dealership, we installed a large tire machine that would handle just about every ag tire we worked on — honestly, it was one of the best investments we made. Besides making the job easier, it saved a lot of wear and tear on the technicians. After wrestling tractor tires for years, your shoulders and your back know it. Tire machines make life easier. That’s just a fact. They also make the job more consistent. Less fighting the tire usually means less chance of damaging a bead, scratching a wheel or damaging something in a hurry.
Another advantage with a tire machine is bringing difficult assemblies back to the shop instead of spending half a day fighting them in the field. Especially if you’ve got a newer technician or the weather isn’t cooperating, sometimes that’s just the smarter option.
I don’t think there’s a right or wrong answer when it comes to tire bars versus tire machines. A good technician can use either. It depends on what works best in the situation. What separates a good technician from a great one isn’t the equipment. It’s understanding the proper technique, taking your time, respecting the tire and wheel/rim components and not taking shortcuts.
If there’s one piece of advice that I could give a new or even seasoned technician, it’s this: Just because you see someone do something on YouTube, Facebook or TikTok doesn’t make it the right way. Keep learning. Ask questions and take advantage of training when it’s available. At the end of the day, the tire can always be replaced. You can’t.
Dave Paulk, manager, field technical services, BKT USA Inc.: When it comes to mounting an agricultural tire, there are two options: choose a mounting machine in a shop or use manual pry bars. The first option can be easier and less challenging, but both methods require high precision and knowledge to minimize the risk of damaging the tire, especially the bead. In fact, if the bead is kinked or broken, the tire is unusable. If the bead rubber is torn, the tire may not seat properly on the wheel, thus resulting in leaking around the bead. This can cause sidewall separation, with air getting under the tire’s inner liner.
Shop-mounted machines are easy to use once a person is familiar with the controls. They take much of the heavy lifting out of the equation. These machines make breaking the bead and dismounting the tire simple, as the tire is lifted into a position that is easy to work on. Although these machines are easy to operate, care must be taken when mounting or dismounting tires to ensure the beads aren’t broken or kinked during operation.
Tires with heavy beads, such as sprayer tires, require extreme care. The last 8-10 inches of the tire bead may need the help of a flat bar to get the bead over the rim. The beads can get into a bind if one is not careful. Using a clamp to hold the bead in place when mounting provides a good starting point. Especially for wide and stiff beads, it is important to let the bead inside the rim well to ease the fitment and to reduce the risk of abnormal stress over the bead area. A good lubricant must be used on the beads and the flange area of the rim to ensure the tire bead goes over the flange lip easily. This prevents the rubber in the bead from tearing.
Boom trucks and mini-booms help with the heavy lifting. The booms can be used to break the bead from the rim or a hammer must be used. Hydraulic bead breakers are also recommended for breaking the bead. Radial tires are generally easier to work with because the beads and sidewalls are more flexible than those on bias tires. If bias tires have tubes, they can be difficult to break. Once the bead is broken from the rim, start with a bar to lift the bead over the rim flange. Using a specific lubricant on the tire bead makes this job easier. Use a second bar to take smaller bites to continue getting the bead over the rim flange.
When remounting a tire, lubricate the bead and the rim well to make it easier to get it over the rim flange. Use bars to get the tire back on the wheel. A C-bar is useful with radial tires on a single-drop wheel. Sometimes there isn’t much room to work, and the C-bar gives a little more room. Tire irons can be used to dismount and remount the tire. Spoon bars are helpful when the bead is tight and care is needed to make sure the bead isn’t damaged.
If it is attempted with a dry bead, there is a high risk of tearing the bead rubber, especially on old tires where the rubber has become brittle. Do not use silicone, petroleum, antifreeze or solvent-based lubricants that can damage the rubber. They also don’t evaporate well and can cause tires to spin on the wheel when put under heavy torque.
Greg Gilland, vice president, global agriculture, Maxam Tire: How an agricultural tire is mounted will directly impact how long the tire remains in service. Improper mounting is one of the most common causes of bead damage and subsequent incorrect tire seating, which can lead to poor air pressure management, resulting in the tires developing sidewall cracking or bead failures with subsequent overheating, leading to premature tire casing failure. How you mount an agricultural tire is as important as which tire you choose.
Bending or kinking the bead area and bead wire during the mounting process can create a structural weakness that can lead to premature failure when the tire is inflated to operate at the required inflation load. External pollutants — mud, loose dirt, wheel metal rust or old lubricant residue not cleaned off the rim components — can negatively impact how the bead seats against the wheel or rim flange, preventing a proper seal and resulting in chronic air loss and/or bead slippage when the tire is operating under both load and speed. The impact is the same for all types of ag tires, from bias to radial to the new technology, VF (very-high flexion) tires. You can choose between the following methods:
-
An automated off-site or in-shop tire mounting machine with mechanical assist;
-
The traditional field service manual mounting process, using a pry bar with a field air pressure portable or vehicle air pump.
Here are the advantages to using automated or on-site tire mounting equipment:
-
Speed of mounting: This can be useful for larger-diameter tires and for larger fleet operations.
-
Reduced physical strain: Using automated or on-site equipment reduces the service operator’s upper body effort of needing to manually pry the bead and sidewalls of the tires.
-
Regulated or even mounting force: An automated or machine-controlled bead breaker and mount head tool can apply consistent as well as more graduated force to seat the beads than manual effort.
Here are some disadvantages of using automated or on-site tire mounting equipment:
-
Greater cost of operation: Agricultural-capacity machines are a large investment and, unless used regularly, can be an expensive tool for limited-service needs.
-
Tire size limitations: Mounting machinery may not be able to be augmented to handle the increasingly larger tractor, harvester, grain cart or sprayer sizes entering the market.
-
Mounting issues or service risk: A poor service operator running the wrong-capacity machine to mount a larger tire can potentially damage a tire bead faster than a skilled technician using manual tools and seasoned service experience.
Next, here are the advantages of using pry bars for mounting:
-
Lower service and maintenance costs: No heavy mounting equipment required beyond a clean set of tire irons; lifting equipment, when needed; and required bead lubricant.
-
Flexibility and portability: Manual tools and seasoned service experience will work anywhere, allowing field service in remote operations during field breakdowns and reducing access limitations.
-
Field service experience: An experienced service technician can feel the bead position and sidewall resistance directly, often catching a problem before it can result in permanent bead area or sidewall damage during the mounting process;
-
Ability to service any size: Manual or field mounting allows the servicing of any ag tire size, including some sizes that exceed what fixed shop machines can handle.
And finally, some disadvantages of using pry bars:
-
Permanent bead damage: Incorrect placement or excessive lever force can bend the bead area and the inner wire, resulting in the most common mounting-related damage for ag tires.
-
Service technician physical demands: Ag tires, especially larger tires, can take real physical effort to achieve correct mounting by hand, with fatigue leading to potential error rates when mounting more than one tire during a service call.
-
Experience and skill: Sustainable and repeatable tire mounting can depend heavily on training and experience. An inexperienced technician using pry bars can do more permanent damage to the tires if using poor techniques.
Even with machine-assisted tire mounting, the technique and steps followed can determine the best outcome. Below are recommended steps to ensure a safe and damage‑free tire mounting experience:
-
Confirm equipment rating: Verify that the tire mounter swing arm, bead breaker and tire mount head are rated for the selected tire diameter and rim seat to be mounted.
-
Clean and inspect all rim components: Any debris — dirt, mud, old lubricant residue and rust on the bead seat and flanges — can cause chronic air loss, regardless of how well the tire is mounted.
-
Use approved, non-oil-based mounting lubricants: Apply a tire mounting lubricant approved for tires that does not degrade rubber onto both the beads and both rim flanges.
-
Match the mount head to the type of tire casing construction: Higher-flexibility sidewall tires like VF and IF (increased flexion) tires require different mounting pressure than standard-casing radial or bias ply tires.
-
Use the wheel or rim flange, not the tire bead. When applying pressure to the bead area, use the rim as the lever to push the bead over the flange lip and minimize putting all the pressure on on the bead itself, as the inner bead wire wrapped in the rubber seat is just inside the tire bead heel.
-
Never apply heat to rubber or metal rim components. Any heat applied compromises the rubber compound and weakens the bead area or the bead wire bonds. If a tire is fighting you, re‑lubricate the beads and flanges while checking your tool placement before applying more force.
-
Confirm bead seating, once inflated. Inspect and verify that both beads on each side of the mounted tires are sitting evenly and symmetrically around the full circumference before inflating or adjusting the tire up or down to its required operating pressure.
Manual tire mounting requires precision, time and the right tools. Below are recommended steps to ensure tires are both mounted safely and effectively:
-
Select and use properly sized tire irons. Using the wrong-sized tool can result in excessive point pressure that will either damage the tire or potentially injure the technician.
-
Use the rim flange, not the bead. When applying pressure to a tire’s bead area, use the rim as the lever to push the bead over the flange lip and minimize putting all the pressure on the bead itself.
-
Work in small increments. Mounting an ag tire is not always a fast exercise, so work in small increments and measure your progress by checking the bead seating around the circumference of the rim or wheel outer flanges. Poor seating is the leading cause of a tire’s early removal or potential failure.
When inflating, do not exceed the air pressure seating limit. Inflate only to the pressure required to seat the bead, generally in the 25 psi to 35 psi range, depending on the tire. Then verify that the tire is properly seated before adjusting the tire up or down to its required operating pressure for a given axle load and required speed. Always inflate the tire safely. Never inflate a tire when in the path or in the range of the rim components' trajectory in case of sudden deflation or release of the metal parts.
Yokohama TWS team: Tire fitting and removal procedures can be dangerous and should only be performed by trained and qualified staff, using the appropriate tools and procedures. Failure to comply with these procedures may result in the tire being incorrectly seated on the rim and could cause a rapid deflation, potentially leading to serious physical injury or death. Always wear personal protective equipment — gloves, footwear, eye protection, hearing protection and headgear — when servicing tires and wheels.
When fitting, first make sure that the rim, the tire and the tube are compatible, then check that the tire is suitable for the machine. The seat diameter of the rim must be exactly the same as the seat diameter of the tire to be mounted. Use only rims recommended or permitted by the tire manufacturer. Always use the proper specialized equipment and tools in good condition — not sharp and suitable for the tires and rims. The rim must be clean and in perfect condition. If necessary, clean the rim thoroughly with a wire brush. Never fit a tire onto a rim that shows cracks, significant distortion or evidence of welded repair. Thoroughly inspect the inside and outside of the tire to identify any deterioration or damage present.
Before fitting the tire, apply lubricant to the rim and the beads. Use only a suitable lubricant that will not damage the tire and is suitable for operation. If you think you’ve put enough lubricant on, put more. For tube-type tires, always use the correct new tube and flap, if required, for the tire size. For tubeless tires, always use a new tubeless valve correctly tightened on tubeless rims. Never use silicone or petroleum-based products.
We recommend vertical fitting. In case of manual horizontal fitting, pay attention to check if the lower bead is correctly seated. Position the valve or valve hole at the bottom, fitting the tire on the rim diametrically opposite to the valve hole.
With the help of a suitable lever and with repeated applications, get the first bead over the rim flange. Position the slightly inflated tube inside the tire, then locate and secure the valve, tightening the nut moderately when mounting with an inner tube. Fit the second bead and lever it progressively over the rim flange. Center the tire on the rim and slowly inflate to ensure correct seating of the beads. Ensure that the beads do not pinch the tube.
During the tire inflation, keep a safe distance and always use a safety cage. If possible, anchor it to the wall and/or the floor or with retaining chains. If no cage is available, the fitter must ensure that no part of his body is in the possible trajectory of the valve mechanism or the caps during inflation. Inflate the tire until the beads are seated properly on the rim. Do not exceed the maximum mounting pressure indicated on the sidewall of the tire.
If the beads are not correctly seated, deflate, reapply the lubricant and inflate again. Repeat this process until the beads are correctly seated. When all the previous steps have been correctly followed, refit the valve core. Set the pressure according to appropriate shipment pressure values or service pressure before removal from the safety device. Make sure the valves do not touch the rims, the brake drums or other fixed mechanical parts. Never try to unseat the beads of an inflated tire. Never use tools that could damage the rims or the beads of the tire.