DESCRIPTION & OPERATION
The tire pressure monitoring system (TPMS) constantly monitors all four pressure values of the tires through sensors fitted on the valve stems. If tire pressure decreases or if there is an issue in the operation of the system, the system alerts the driver through the Electronic Vehicle Information Center (EVIC) in the Instrument Panel Cluster (IPC). The system resets automatically after the wheels have been rotated. The sensors also transmit a unique ID code to differentiate the sensors from those on nearby vehicles.
TPMS thresholds have been established for the original tire size equipped on the vehicle. Use original size tires only to maintain system accuracy.
The Radio Frequency Hub (RFH) module receives the radio signals from the tire pressure sensors and sends the relevant values to other modules via the Controller Area Network - Chassis (CAN-C) data bus. The RFH module identifies the sensor position, receives the sensor data, compares the pressure data with the standard pressure values stored, determines whether there is a problem in the tire pressure and stores the warnings regarding tire pressure and system faults. When a sensor is installed in a tire on the vehicle, the RFH module can automatically identify the sensor and its location during the first ensuing drive cycle. Identification will take approximately 10 minutes but the speed of the vehicle must exceed 15 mph. The TPM-RKE 9936 analyzer can also be used to program the new sensor ID number in the RFH module. The sensor IDs can also be programmed using a diagnostic scan tool. Scan each TPMS sensor at each road wheel and store each sensor ID in the correct location: Left Front/Right Front/Right Rear/Left Rear.
Connect the diagnostic scan tool, then follow the programming steps outlined in the scan tool.
TPMS DIAGNOSIS
When diagnosing a tire pressure issue, first check the warning light in the IPC during starting. From the OFF position, turn the ignition switch ON and check the TPMS warning light to observe one of the following:
- If after 10 seconds the warning light is on and constant (not flashing), then one or more of the tires has low pressure or another fault exists.
- If after 10 seconds the warning light flashes for 75 seconds, then remains on constantly, a fault has been detected in the system.
Tire pressure values are also displayed in the EVIC. If the RFH module does not receive a signal from a sensor, dashes will be displayed in lieu of a pressure value. If a low pressure warning is indicated, check the air pressure in all tires with an accurate pressure gauge. If the pressure in the tire is low, diagnose and repair the cause of the low pressure. Install the tire, or tires, on the vehicle and allow approximately two minutes for the message or warning light to turn off. If the message or warning light remains on, another fault is present. If a system fault exists, check for the following conditions which may cause a system fault:
- Signal interference due to electronic devices or driving next to facilities emitting the same radio frequencies as the TPMS sensors.
- Accumulation of snow or ice around the wheels or wheel housings.
- Using snow chains.
- Using wheels not equipped with TPMS sensors.
- Incorrectly programmed Sensor ID numbers.
DTCs for TPMS are stored in the RFH. Check for DTCs using diagnostic equipment. If a new sensor is installed, perform one of the following procedures to program the RFH with the new sensor ID:
- Use the TPM-RKE 9936 analyzer, with the diagnostic equipment, to program the TPMS module with the tire pressure sensor ID.
- Once the vehicle has remained stationary for more than 20 minutes, the RFH should automatically learn the sensor ID when the vehicle is driven for a minimum of 10 minutes while maintaining a continuous speed above 15 mph.
SENSOR REMOVAL
The tire pressure sensor, valve stem and all valve stem components including the cap and valve core can be serviced and replaced individually.
When demounting or mounting the tire on the wheel, follow the tire changer manufacturers instructions while paying attention to avoid damaging the pressure sensor.
1. Raise and support the vehicle. Then remove the tire and wheel assembly and demount the tire from the wheel.
Replace the valve stem assembly with each tire change or when the tire is removed from the wheel. Install a new valve stem and valve stem core if they are removed from the wheel or valve stem.
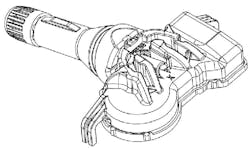
2. To remove the sensor from the valve stem, press down on the spring clip using a small screwdriver while pulling.
3. Remove the valve stem from the wheel.
SENSOR INSTALLATION
Any time a sensor is to be reinstalled in a wheel, a new valve stem assembly must be installed to ensure air tight sealing.
When installing a new valve stem, do not install it with the sensor attached. If it is a new sensor, separate the valve stem from the sensor first then install the components separately. Replace the valve stem assembly with each tire change or when the tire is removed from the wheel.
When installing a new valve stem, water or water/soap solution should be used for proper installation into the wheel.
1. Wipe the area clean around sensor/valve stem mounting hole in wheel. Make sure surface of wheel is not damaged.
2. Position the valve stem into the wheel mounting hole with the rib at the 12 o'clock position to the wheel, then pull through to seat with a standard valve stem installation tool.
The valve stem has two notches on the locking pin where the sensor can be installed, depending on the thickness of the rim on the wheel. The sensor is properly installed if the sensor is as close as possible to the valve and the locking pin is visible past the spring clip.
3. Install the sensor onto the valve stem by aligning the rib in the sensor to the valve stem. The locking pin will be visible slightly after installed.
4. The first notch is for a wheel with a thick rim. Push down on the spring clip using a small screwdriver and slide the sensor up until it stops against the bottom part of the valve. Gently pull down to verify the spring clip has engaged. The locking pin will be highly visible.
5. The second notch is for a wheel with a thin rim. Push down the spring clip using a small screwdriver and slide the sensor up until it stops against the bottom part of the valve. Gently pull down to verify the spring clip has engaged.
6. Mount tire on wheel and install the assembly on the vehicle and adjust air pressure to that listed on the vehicle placard. Make sure original style valve stem cap is securely installed to keep moisture out of sensor. Remove the support and lower the vehicle.
7. Perform one of the following to make the system learn the new sensor ID:
- Use the TPM-RKE Analyzer, 9936, with the scan tool to program the RF Hub module with the tire pressure sensor ID.
- Once the vehicle has remained stationary for more than 20 minutes, drive vehicle for a minimum of 20 minutes while maintaining a continuous speed above 20 mph. During this time, the system will learn the new sensor ID.
About the Author
Mitchell 1
Information for this column comes from the tire pressure monitoring systems data in ProDemand, Mitchell 1's auto repair information software for domestic and import vehicles. Headquartered in San Diego, Mitchell 1 has provided quality repair information solutions to the automotive industry since 1918. For more information, visit www.mitchell1.com.