SUBJECT VEHICLE: 2009 Kia Rio.
SENSOR IN TIRE? No (sensors are located in each wheel well).
RESET PROCEDURE? Yes (whenever a new sensor has been installed).
SPECIAL TOOLS NEEDED? Yes (TPMS exciter scan tool).
The tire pressure monitoring system (TPMS) for the 2009 Kia Rio consists of the following components: a TPMS receiver, four radio frequency tire pressure monitor sensors, a low tire pressure warning indicator and a TPMS warning indicator.
The TPMS sensors are located in each wheel well. They measure both tire pressure and temperature and transmit data to the TPMS receiver.
Sensors operate in four modes: configuration, normal fixed base, storage auto and alert.
In configuration mode, the sensor will measure pressure every 20 seconds and will transmit every three minutes and 20 seconds.
In normal fixed base mode, the sensor measures and transmits in the configuration mode until the TPMS sensor receives a command to switch into another mode.
In storage mode, the sensor enters into a low power consumption state where no measurements are made. The sensor will not transmit unless asked to.
In alert mode, the sensor will measure and transmit every four seconds. The sensor will enter this mode when the temperature is more than 230 degrees and the tire pressure changes 3 psi from the last transmission.
The TPMS receiver decides which warning indicator to illuminate from the radio frequency data sent to it by the sensors. When tire pressure falls beneath a certain threshold, the low pressure indicator on the instrument cluster will illuminate.
If the TPMS detects a fault with the receiver or sensor, the TPMS warning indicator also will be illuminated. If the fault is considered critical, the light will stay on throughout the whole ignition cycle.
[PAGEBREAK]
Replacing the sensor
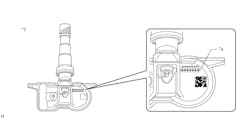
Before you can replace an old sensor, you must first demount the tire from the wheel. Also make sure the wheel to be fitted has been designed for sensor mounting. There should be a mark to indicate this. Follow these steps:
1. Remove the tire and wheel assembly. Avoid touching any tool to the valve when demounting the tire.
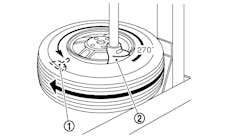
2. Deflate the tire and remove the balance weights. The tire bead should be broken 90 degrees from the valve side of the wheel. The bead breaker should not be set too deep. Demount should end near the valve.
3. Remove the valve nut. Make sure you do not re-use it.
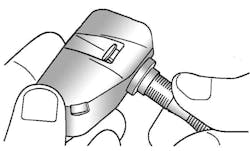
4. Assemble the new sensor to the valve. Turn the valve three times with the square part of your screw in the slot. Make sure the sensor feet are against the wheel throughout the remainder of the assembly process.
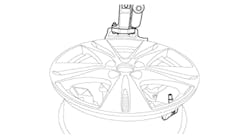
5. Ensure that the valve hole and mating face of the wheel are clean. Mount the assembly to the wheel. The fit should not be tight (i.e. it should still be possible to easily adjust the valve angle.)
6. Tighten the washer and nut by hand until the valve thread meets the nut. Do not exceed the allowed torque. Do not use electric or pneumatic tools.
7. Using the torque wrench, tighten the nut to 35 to 37 in.-lbs. It is normal to feel a break at 20.4 in.-lbs. Increase torque smoothly in order to achieve a clean break of the stop.
8. Lubricate the tire bead.
9. Start tire mounting at about 5.9 inches from the valve. Move the mounting tool away from the valve. Avoid touching the valve with the tool.
10. Adjust inflation pressure for all tires. Install the valve cap.
Now you’re ready to initiate the new sensor, which must be done every time a sensor is replaced. You must use a TPMS exciter scan tool. Follow these steps:
1. Using the TPMS exciter, change the state of the TPMS sensor to “Normal Fixed Base Mode.”
2. Read each tire pressure sensor ID in the following order: front left, front right, rear left and rear right.
3. Connect the TPMS exciter tool to the Data Link Connector located under the left side of the instrument panel.
4. Register the four sensor IDs to the receiver.
5. Disconnect the TPMS exciter tool from the diagnostic link. Cycle the ignition and wait 15 seconds.
6. Check to see the TPMS recognizes each tire.
Never attempt to perform the initiation procedure if the Rio is parked on a metal floor, roof or an alignment rack or lift. The metal will transfer the radio frequency signals, which can cause the procedure to fail. ■
Information for this column comes from Mitchell 1’s ”Tire Pressure Monitoring Systems Guide” for domestic and import vehicles through 2008. Headquartered in Poway, Calif., Mitchell 1 has provided quality repair information solutions to the automotive industry for more than 80 years.
For more information, visit the company’s Web site at www.mitchell1.com.
a.com.


